
Canauri Testing Procedures
Resources
Canauri Installation and User Guide
Lab Setup
Setting up a lab to test Canauri is very easy. All you need to preform a test is a server or workstation loaded with test data and a utility to simulate real ransomware. It is recommended that you isolate this lab from your production network if you are going to test real ransomware variants. The server and workstation should be setup in a domain environment with at least one server share that is mapped to the workstation.
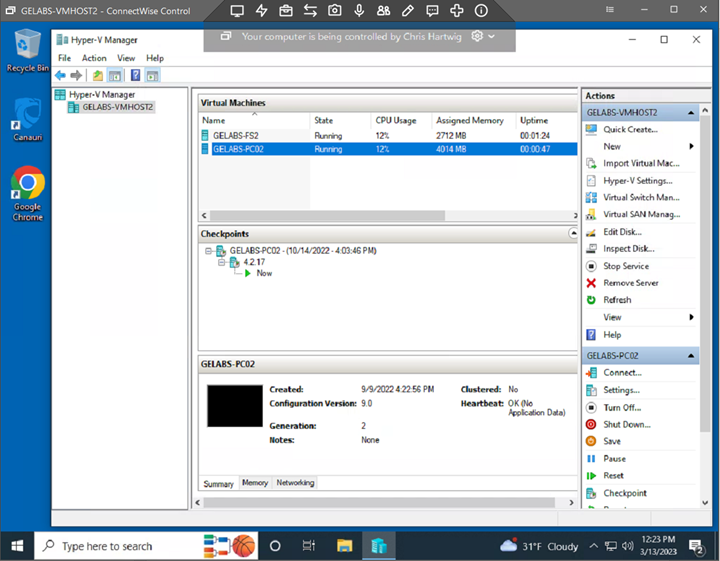
Lab Workstation
The lab workstation should have data files populated in each folder under each user profile. (Documents, Music, Pictures, Videos) You may also create additional data folders at C:\. When testing a workstation there are two attack surfaces to defend. The root of C:\ and the user profiles.

Lab Server
The lab server should have data files populated in each folder under each user profile. (Documents, Music, Pictures, Videos). You may also create additional data folders at C:\. At least one shared folder should be created on C:\ or another volume on the server. When testing a server, there are three attack surfaces to defend. The root of C:\, the user profiles and the server shares.
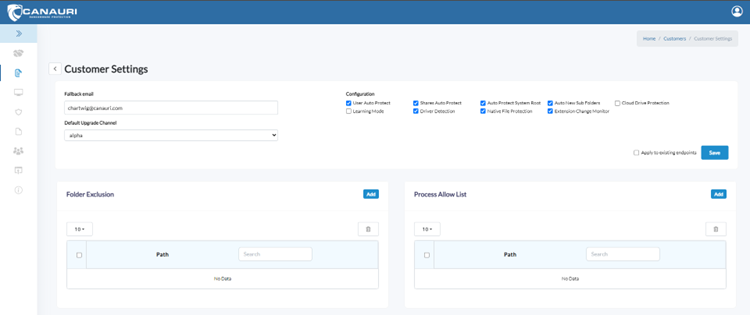
Portal Configuration
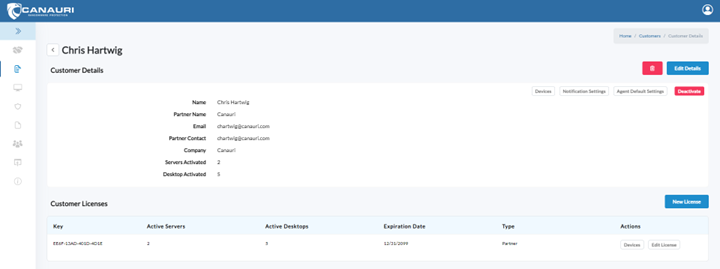
Before installing Canauri, login to the Canauri Portal and select the customers tab from the sandwich menu. Select your customer account. The key to activate Canauri is located on the Customer Details page under the section titled “Customer Licenses.”
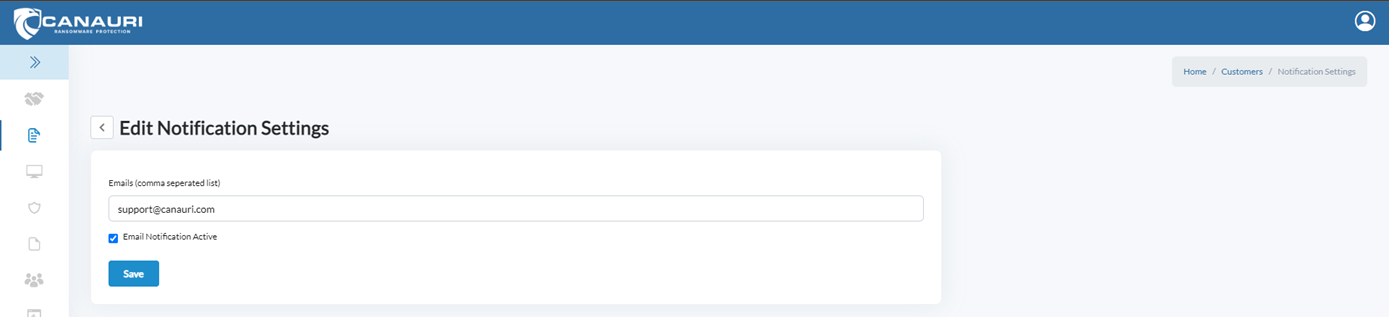
Next, configure the Notification Settings and Agent Default Settings.
Notification Settings
The Notification Setting is the email address where alert messages should be sent and the Agent Default Settings allow for features to be turned on and off and configuration of a fallback email address.
Agent Default Settings
For testing, it is recommended that you keep the default settings as shown in the screenshot.
Install and Test Canauri
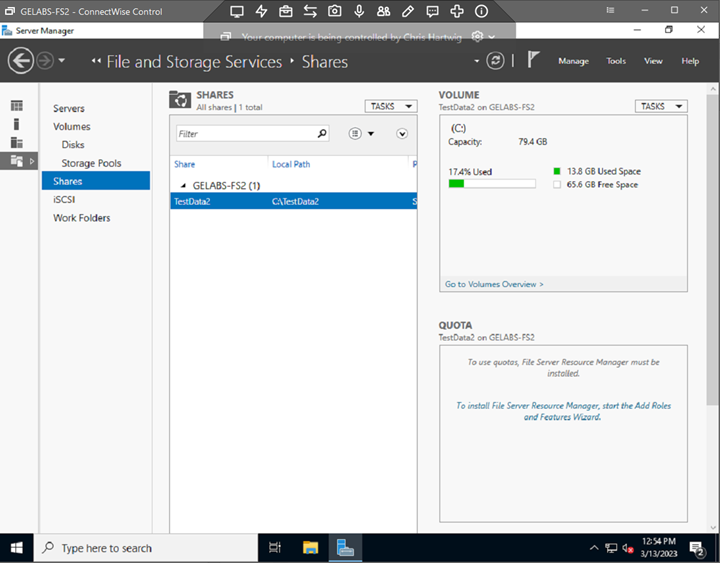
- Create Shared folder on Server.
- Map shared folder to workstation.
- Install Canauri on both server and workstation by running the canauri-installer.msi package.
- Login to the server.
- From the system tray locate the Canauri icon and r-click the icon. Select “Open Control Center”.
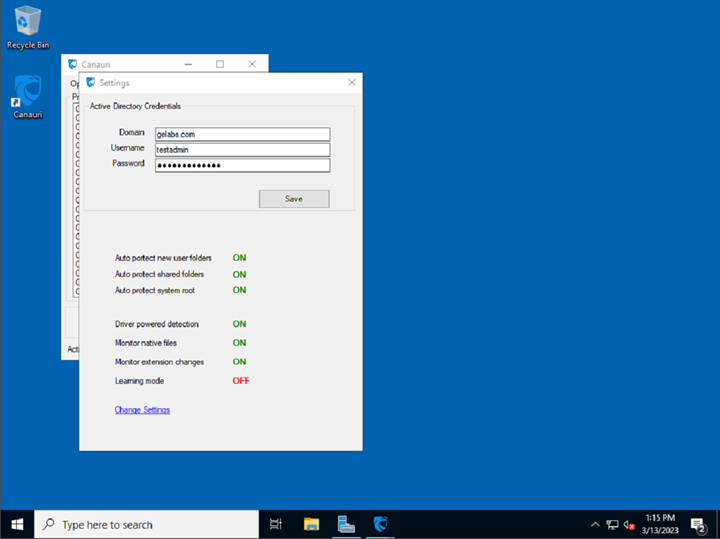
- From Canauri app, choose Options > Settings and configure the AD credentials used to send a shutdown command to a malicious workstation.
- Wait 30 minutes to ensure Canauri has adequate time to deploy hidden honeypot files.
- Ensure endpoints are online and activated in the Canauri portal.
- Snapshot the virtual environment.
- Run test attack against workstation.
- Verify malicious process is suspended.
- Verify 15 second alert message was generated for the user.
- Verify the malicious process is terminated after 15 second suspension and alert period.
- Verify alert email was received.
- From the workstation, run attack against the mapped drive to the server share.
- Verify 2-minute shutdown alert generated on workstation.
- Verify Inbound firewall rule created on server called “Canauri”.
- Verify the workstation IP is isolated in the Canauri firewall rule under the scope tab.
- Verify the workstation is shut down after two minutes.
- Verify alert email was received.
Attack Testing Methods
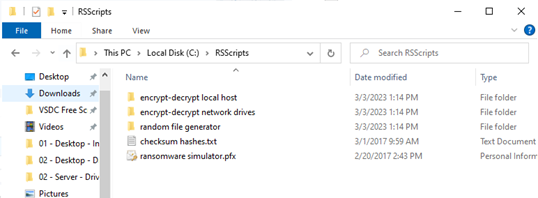
Use Ransomware Simulator Script
The simulator encrypts data allowing a tester to demonstrate the reaction to data encryption by the security stack. The ransomware simulator script and setup instructions can be found here.
Use Real Ransomware
Real ransomware variants can be downloaded from virusshare.com.
Delete Honeypot files
Simply deleting the hidden honeypot files will trigger Canauri.