
For too long, consumers have been without a method to test the cyber security products that they are purchasing or evaluating. Instead, the products are ‘field tested’ during a real event, at which time it’s revealed that the products didn’t perform as expected. WatchPoint is disrupting the cyber security market by providing all consumers with a way to test their defenses before it’s too late.
Ransomware simulations
There is really no shortcut for something like this. It’s not enough to just know what files could be encrypted, and you certainly don’t need a tool to tell you that. What you need is a ransomware simulator that can safely encrypt some files on your computer, to let you know if your defenses are actually working.
At WatchPoint, we’ve developed a PowerShell script that will encrypt data on your server, workstation or laptop, but in a way that’s under your control, has an off switch and allows you to decrypt the data as well. It has the potential to do as much harm as the delete button on your keyboard, but when used correctly it can be an invaluable tool that will uncover the answer to the important question of whether or not your security products are working.
Overview
We have written two PowerShell scripts that function just like ransomware. One script encrypts the data, and the other script decrypts the data using a public/private key pair. We created these as a tool so that you can test your defenses against the real thing. The purpose of the decrypter is to ensure that your files aren’t permanently destroyed.
Here is an overview of how it works.
###USE AT YOUR OWN RISK – THESE SCRIPTS ARE PROVIDED FREE OF CHARGE – WATCHPOINT DOES NOT PROVIDE SUPPORT FOR THESE SCRIPTS. THIS IS A FREE TOOL FOR TESTING PURPOSES ONLY. DO NOT RUN IN A PRODUCTION ENVIRONMENT.###
{{cta(‘8d29d3ec-c2f6-4ab8-99df-a2fe864fd9a5’)}}
- First, you must have a certificate. I’ve included one in the download for ease of use.
- When you run the script, a dialog box will open, prompting you to choose the folder you’d like to attack. This could be a single folder on the desktop, the entire desktop, or any folder you’d like.
- All files are discovered.
- Each file is encrypted with the Public key of the certificate.
- After all the files have been encrypted, the script exits.
The decryption script does the same thing, except that it decrypts files instead of encrypting them. The script also makes a copy of every file before it encrypts them. It stores the copy in env:temp. It should go without saying, but please make sure you have a good backup before running this ransomware simulator, as the files will be encrypted.
Make sure that you have permission. WatchPoint is not responsible for any outcome of running these scripts. If you know what you’re doing, then it’s safe, if not then please don’t do it! Also, here is a link to some other similar tools we’ve created.
Here are the steps to run the ransomware simulation:
The Environment:
This script, just like actual ransomware, will encrypt files very quickly. Because of this, you need to configure your test folder with a minimum number of folders and files. We recommend three subfolders, with 100 files each, for a total of 300 files.
- To run the simulation, you’ll need a Windows workstation or laptop. Windows 7 SP1, Windows 8, 8.1 and Windows 10 are supported.
- You need a folder containing data and subfolders for testing. We recommend a minimum of three subfolders with 100 files each. To make things easier, you can use the random file generator script included in the download.
The Simulation
As mentioned previously, you’re going to need a test computer from which to run the simulation. In my example, I am using a Windows 8 computer, but Windows 7 and Windows 10 will work just fine.
- Make sure that you have a good backup.
- Double check that you do indeed have a good backup.
- Extract all files in the ransomware_simulation_scripts.zip. The password to open the zip file is watchpoint
- Before we can run the script, we have to provide it a certificate to use.
- In this step, I’ll show you how to import the certificate, but if you already have one that you’d like to use, then you can skip this step.
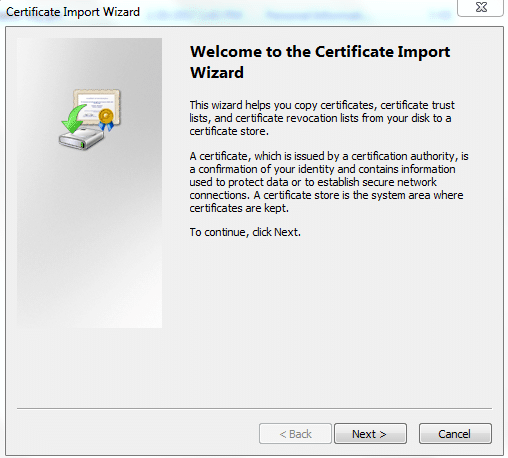
- Double-click the certificate that is included in the download. You’ll be presented with the ‘Certificate Import ‘

- Click Next > Next again.
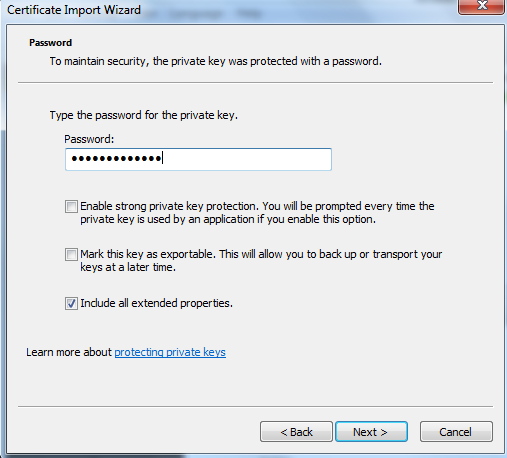
- Enter the password for the private key. The password is intentionally simple, for ease of use purposes. The password is: mypassword123
- Click Next > Next again > Finish.
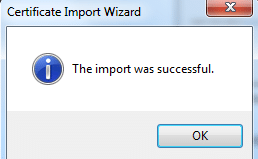
- You’ll be presented with a confirmation.
Get-childitem cert:\currentuser\my
- Double-click the certificate that is included in the download. You’ll be presented with the ‘Certificate Import ‘
- Now we need to identify the thumbprint of our certificate.
- Open an administrative PowerShell prompt and enter the following command: Get-childitem cert:\currentuser\my

- You should see output similar to what is below.

- Copy the thumbprint id to the PowerShell scripts, see below:
Before:
![]()
After:
![]()
9. Next, set up the test folder to use for the simulation.
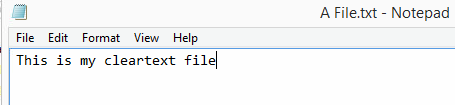
10. Additionally, let’s create a test file in our test folder and enter some text. The text will be encrypted after we run our simulation.
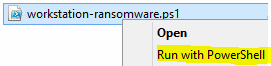
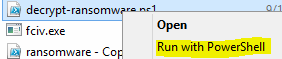
 11. Now it’s time to run the PowerShell ransomware/encryption script. Right click the script and select ‘Run with PowerShell.’
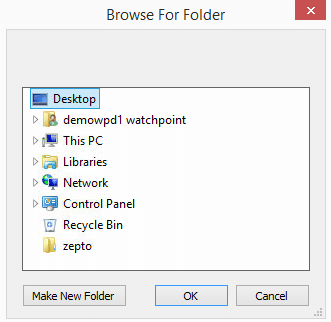
12. You are presented with a ‘Browse For Folder’ window. From here select the test folder that you want to encrypt and then select OK.
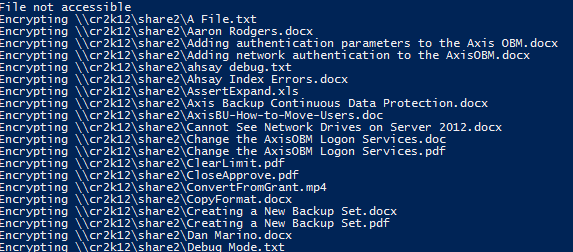
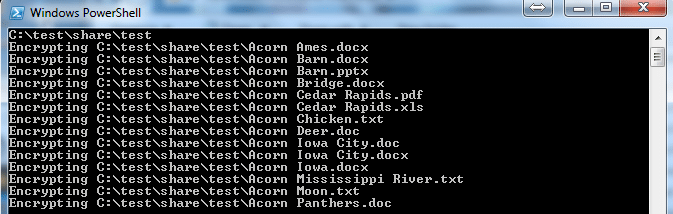
13. You should immediately start seeing output like this:
14. Now let’s check our plain text file. As you’ll see it’s not clear-text anymore, which means the encryption worked!

But the big question is, did your defenses work? Was the ransomware attack blocked or were all the files encrypted? Only you can answer that question, but if you had Canauri, then it definitely did!
15. Next, use the decrypt script to decrypt your files. Just like before, right-click the script and select ‘Run with PowerShell.’
16. Presto! The original file is back!

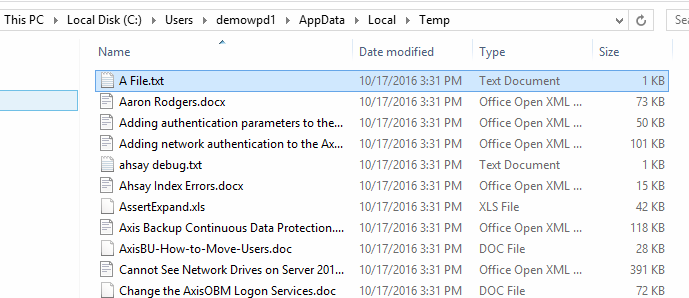
17. On a side note, and as I mentioned earlier, the script makes a copy of every file it encrypts to the env:temp directory, aka C:\users\username\AppData\Local\Temp. So if you didn’t heed the warnings in steps 1 and 2, check this directory for a copy of the files, just in case the decryption didn’t work.
That’s it. You now have a simple and effective way to test the security of your computer against an attack. And because we have the decrypter, you can undo the effects of the simulated attack. Put Canauri to the test – download a free trial and protect your valuable data.
###USE AT YOUR OWN RISK – THESE SCRIPTS ARE PROVIDED FREE OF CHARGE – WATCHPOINT DOES NOT PROVIDE SUPPORT FOR THESE SCRIPTS. THIS IS A FREE TOOL FOR TESTING PURPOSES ONLY. DO NOT RUN IN A PRODUCTION ENVIRONMENT.###
{{cta(‘8d29d3ec-c2f6-4ab8-99df-a2fe864fd9a5’)}}