
Overview
Monitoring systems provide great value because they alert us to unusual events. They allow us to check a box on our audit sheet, but really a monitoring system is just half of the equation. The other half of the equation requires an action in response to the event.
Last week’s Tip-of-the-Week provided a simple detection to notification bridge for locked out accounts. This week’s tip takes things a step further, by arming our systems with an automated action in response to brute force attempts. Using Powershell, we’ll create a brute force detection script that automatically defends our network, by blocking the source IP address of the attack.
First things first, before we jump right in, let’s understand a few points:
- By default, Windows does not log the IP address of a failed RDP connection
- Third party tools are not required to get the IP address
- Small changes to our environment are required to get the IP address
I recall from the Windows 2003 days that Windows would log the IP address of the source computer but on newer 2008 and 2012 servers, this is no longer the case. So what has changed and why? Microsoft has a tendency to implement ‘security through obscurity’ so I knew this would be a challenge. Enabling failed logon auditing was not giving me the source IP address, so we needed to dig deeper. What we found was a combination of NT LAN Manager (NTLM), and Network Level Authentication (NLA), had changed between 2003 and 2008. These changes need to be reverted to in order to gather the source IP address.
To better understand those changes, let’s explore briefly what they are. Denying all NTLM authentication requests is the first change and disabling NLA for Remote Desktop Protocol (RDP) is the second change. NTLM is a very old and insecure protocol. NTLM has been replaced by more secure protocols and using it offers far more risk than reward, so this global environment change should be a layup. For more about the security implications of using NTLM read this TechNet article.
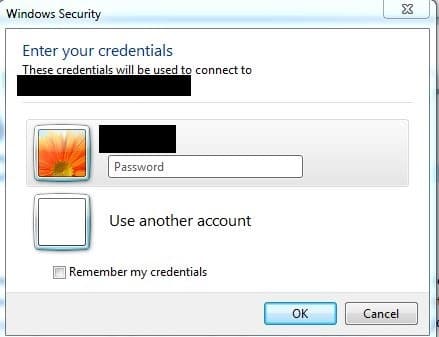
NLA must also be disabled. So what is NLA exactly? NLA was implemented by Microsoft as a way to increase the security of RDP. So if we disable NLA, aren’t we weakening the security of our system? Not really, it won’t pose a significant risk and here’s why. RDP uses strong encryption by default and NLA only reduces the risk of denial-of-service attacks. All that NLA is doing is reducing the amount of resources that are used at the initial stages of an RDP connection. So NLA is a denial-of-service protection, not an encryption or authentication solution. To better understand the differences here are before and after pictures with NLA enabled and NLA disabled.
NLA enabled
NLA disabled
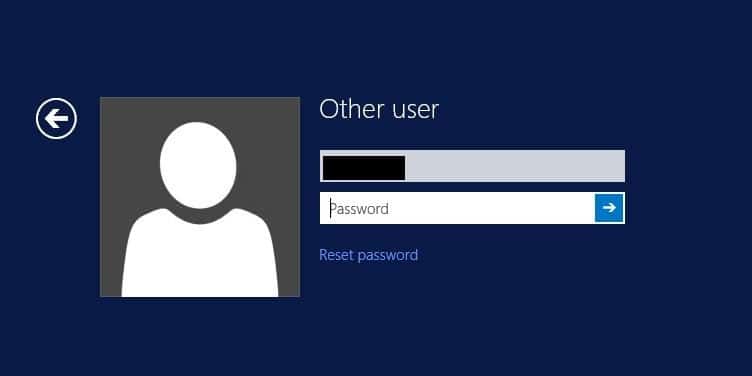
As you can see, NLA is just hiding the login prompt. With NLA enabled, we never see the desktop logon prompt and not sending that information down the wire reduces resources and helps to prevent denial-of-service attacks. With NLA disabled, we can see the desktop logon prompt. To read more about NLA, reference this article.
Moving on, this article assumes that the environment is already configured with failed logon auditing. If not, please use the links provided. Everything else that needs to be configured is covered in the steps below.
Instructions:
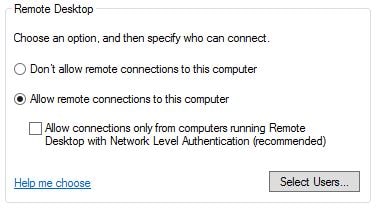
- Disable NLA on the server. This step must be completed first, or you’ll break RDP when we disable NTLM. Right click computer > properties > uncheck the box below ‘Allow remote connections to this computer’.
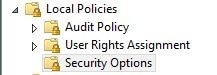
- Disable NTLM. Using group policy or local security manager, navigate to Local Policies > Security Options.
- Locate the below entry for ‘Network security: Restrict NTLM: Incoming NTLM traffic’. Set to ‘Deny all accounts’.

Tip, if you’re not comfortable making this change, you can enable auditing of incoming NTLM transactions, and that will let you know who/what is using NTLM to authenticate. That setting is also shown in the above graphic.
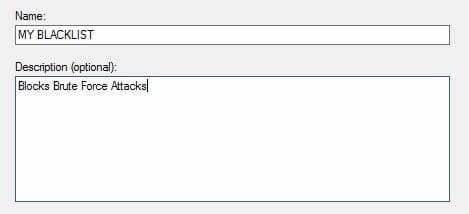
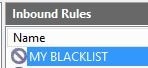
4. Create a Windows firewall rule for our script. I am calling mine ‘My BlackList’ Call yours whatever you’d like, just make a note of it as we’ll need it later on.
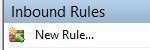
Using Windows Firewall with Advanced Settings, select Inbound Rules > New Rule.
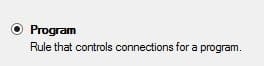
5. Select Program > Next.
6. All programs > Next.

7. Allow the connection. THIS IS IMPORTANT. Do NOT select ‘Block the connection’ or you’ll kick everyone off the server, so allow the connection and we’ll block it later > Next.
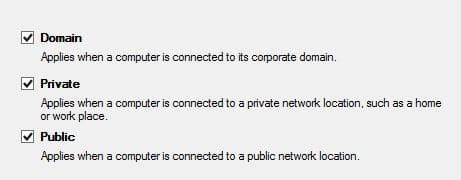
8. Check the boxes that match your environment > Next.
 9. Name the rule > Finish.
10. Open the newly created rule to finish a few parameters.
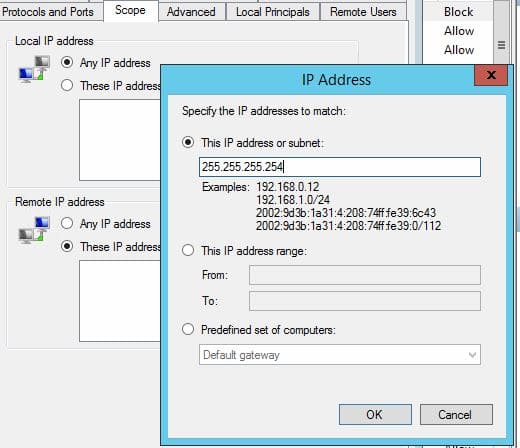
11. Select the Scope tab and add 255.255.255.254. This is a placeholder IP so the rule won’t block everyone!
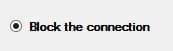
12. With a placeholder IP address added, we can now block the connection. Using the General tab select ‘Block the connection’ > OK
13. Windows firewall is now configured, so we can now configure the Powershell script. Open the script and find these two lines. Update the bold text with your information.
- $logfile = “C:\support\blocked.txt“
- $ar = $fw.rules | where {$_.name -eq ‘MY BLACKLIST’}
Download your copy of the powershell script
14. Save the script. Next, we’ll create a schedule task, so it runs automatically.
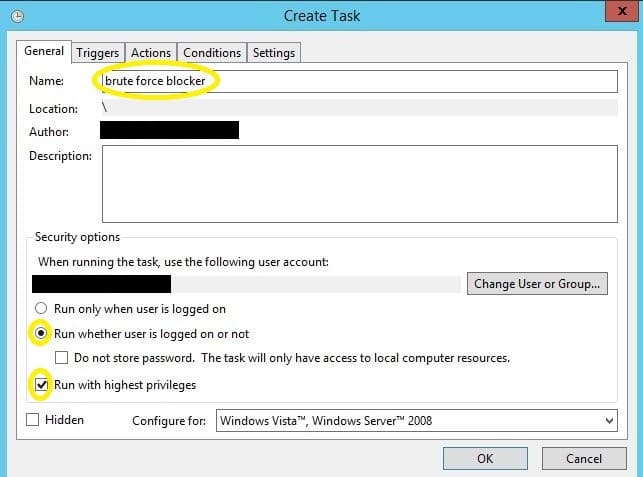
15. Open task manager and select ‘Create New Task’. Give it a proper name and ensure that ‘Run whether user is logged on or not’ is selected and that ‘run with highest privileges’ is selected. Sensitive information has been removed from this graphic.
 16. Define the Triggers tab. Configure the ‘Repeat task every’ to a value that is less than your account lockout duration. For example, if the account lockout duration is 60 minutes, then configure the task for every 45 minutes.
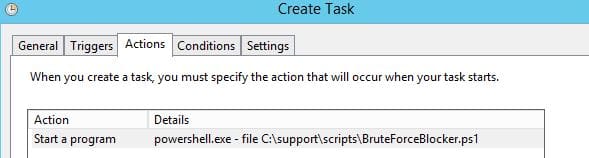
 17. Next is the Actions tab. Click the Actions Tab and select “New” to create a new action.
- In the field “Program/Script:” type: powershell.exe
- In the filed “Add arguments” type: -file C:\support\scripts\BruteForceBlocker.ps1
18. The rest of the settings can remain at the default settings.
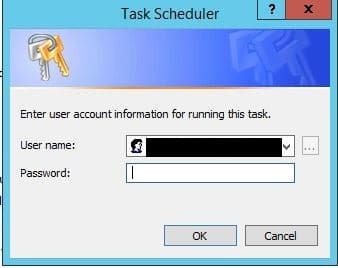
19. Click OK and enter the username and password of the user account. *Note the user account will require ‘run scheduled task/batch file permissions’. Sensitive information removed from screenshot.
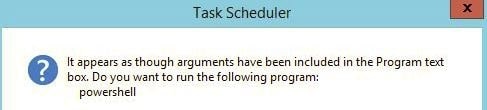
20. Click yes at the next prompt.
21. Next, you’ll need to purposefully fail a login 10 times. Once that happens the computer will no longer be able to connect via RDP and you’ll see the IP address blocked in the ‘MY BlackList’. For illustration purposes, I am showing an internal IP address in the picture, but it will block external IP addresses as well.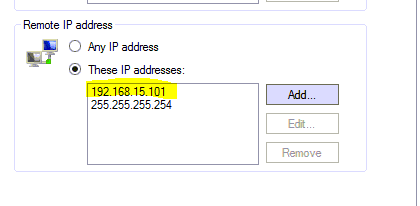
That’s all there is to it. Now you have an automated brute force attack blocker that doesn’t require any third-party tools.