
Use PowerShell and Exchange to Notify All Employees through Text Message
Do you worry about the safety of your friends, family, and coworkers? It seems like every day there is a report of an active shooter or a natural disaster that is affecting people, businesses, and entire communities. In the interest of emergency preparedness at work, here is a way to communicate quickly to your co-workers should such an event take place.
Text messaging is a more effective means of communication than email in an emergency. Powershell is a valuable task automation tool put to good use to create a script that sends a text message to the group of your choosing. If you’d prefer a paid service, then AtHoc or RapidReach may be the solution for you. For those more frugal, and who also have an Exchange server, you can configure this without any additional costs or changes to your infrastructure.
Here are the steps:
- Create a distribution group in Exchange. The Powershell script will read the mobile number of every user in this group. More on that later.
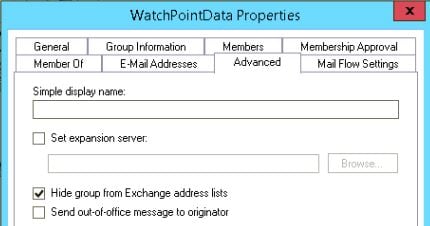
- We created a group called ‘WatchPointData.’ As a precaution, we’re going to ‘hide’ this group from the shared address list, so the members don’t get random text messages from fellow employees.
- Check the box for ‘Hide group from Exchange address.’
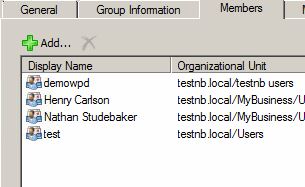
- Add employees to the group via the ‘Members’ tab.
- Populate the ‘Telephones’ field of the active directory users. This step may take some time, as you’ll have to do it the old fashioned way – one step at a time, with the information gathered from your employees. For privacy reasons, cell phone manufacturers don’t include the cell phone number when communicating to Exchange, even when using ActiveSync. When requesting the information, be sure to ask for their carrier. For example, if the carrier is Verizon you would send the email to text messages to [email protected]. Replace cell number with the actual number and the @vtext.com signifies that it’s Verizon. Each carrier has their own @ field, and a Google search will tell you what that value is, or reference this website for a complete list.
- Once you have the cell phone number and carrier information for each user, populate the Mobile field in Active Directory. The example uses a fictitious number for illustration purposes.
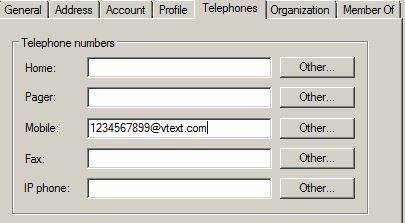
- Once you have the cell phone number and carrier information for each user, populate the Mobile field in Active Directory. The example uses a fictitious number for illustration purposes.
- After preparing the Active Directory, update the script to match your environment. The email settings and .csv paths will need to be updated to reflect your environment. Please note that the password is stored in plain text. In later versions, we’ll update the script to encrypt the password but for now it’s in plain text so keep it somewhere safe. Below is the complete script:
##########################################################These variables define authentication to the email server. The red text needs to be #updated to reflect your environment. Don’t declare a ‘to’ field, as it’s used at the #end. Modify the from,body,sub,creduser,credpass,smtpserver,and port fields.
$From = “[email protected]”
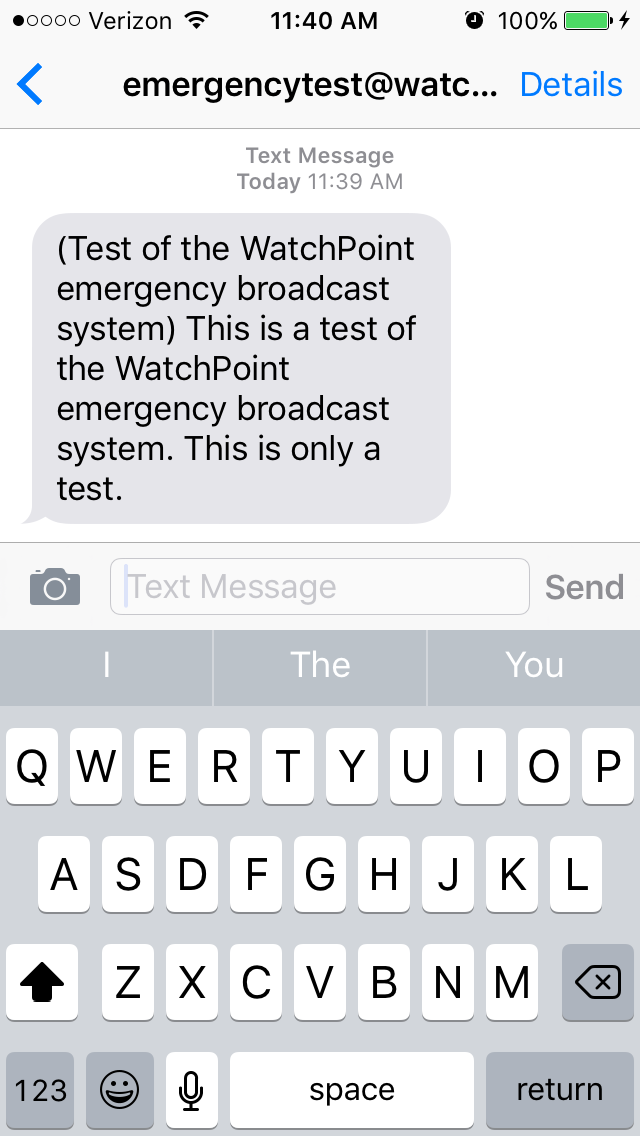
$Body = “This is a test of the WatchPoint emergency broadcast system. This is only a test.”
$Sub = “Test of the WatchPoint emergency broadcast system”
$CredUser = “[email protected]”
$CredPass = “password” | ConvertTo-SecureString -AsPlainText -Force
$Credentials = New-Object System.Management.Automation.Pscredential -Argumentlist $CredUser,$CredPass
$SmtpServer = “mail.mydomain.com”
$Port = “587”
#Declare the csv paths. The text in red will need to be updated to reflect your #environment.
$exportmembers = “C:testwatchpointdata.csv”
$exportresults = “C:testresults.csv”
#Replace “WatchPointData” with your groups actual name. Keep the “”. This #section collects all of the members that belong to our hidden distribution group #and exports to a csv.
$members = get-adgroupmember “WatchPointData” | select-object -property “SamAccountName” | export-csv $exportmembers
#Nothing needs changed here. This section collects the name, login, and mobile #phone number for each member of the group and is used in the next section.
Import-CSV -Path $exportmembers | ForEach-Object {
Get-ADUser -Filter “SamAccountName -like ‘*$($_.SamAccountName)*'” -Properties MobilePhone,UserPrincipalName,Name | select Name,UserPrincipalName,MobilePhone
} | Export-CSV $exportresults -NoTypeInformation
#Nothing needs changed here. This section gathers just the “MobilePhone” number #that we exported from the above section.
$textnumbers = import-csv $exportresults | % {$_.MobilePhone}
#Nothing needs to be changed here. This section sends an email as text to each #user.
ForEach($cellnumber in $textnumbers)
{
Send-MailMessage -To $cellnumber -From $From -Body $Body -Subject $Sub -Credential $Credentials -SmtpServer $SmtpServer -Port $Port
}
#End of Script
#########################################################
- With the script modified for your environment it’s time to run the script. Simply open Powershell and run the script using .employee_emergency_notification.ps1 or whatever name you assigned to the script. This will send a text message to everyone in the .csv file.

- You will then get a text message similar to the one below:
To send a real emergency message:
- Change the $Body and $Sub line with the relevant information.
- Verify the credentials are current.
- Run the script.
Hopefully you never have to use the script, but if you do, you now have an easy way to notify all of your employees about an emergency situation and get the message out to them quickly.